Sending messages
In a integration test scenario we want to trigger processes and call interface services on the system under test. In order to do this we need to be able to send messages to various message transports. Therefore the send message test action in Citrus is one of the most important test actions. First of all let us have a look at the Citrus message definition in Citrus:
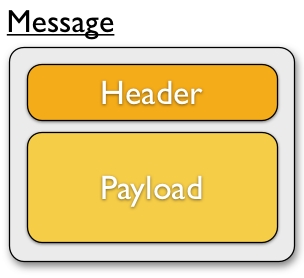
A message consists of a message header (name-value pairs) and a message payload. Later in this section we will see different ways of constructing a message with payload and header values. But first of all let's concentrate on a simple sending message action inside a test case.
XML DSL
<testcase name="SendMessageTest">
    <description>Basic send message example</description>

    <variables>
        <variable name="text" value="Hello Citrus!"/>
        <variable name="messageId" value="Mx1x123456789"/>
    </variables>

    <actions>
        <send endpoint="helloServiceEndpoint">
            <message name="helloMessage">
                <payload>
                    <TestMessage>
                        <Text>${text}</Text>
                    </TestMessage>
                </payload>
            </message>
            <header>
                <element name="Operation" value="sayHello"/>
                <element name="MessageId" value="${messageId}"/>
            </header>
        </send>
    </actions>
</testcase>
The message name is optional and defines the message identifier in the local message store. This message name is very useful when accessing the message content later on during the test case. The local message store is handled per test case and contains all exchanged messages. The sample uses both header and payload as message parts to send. In both parts you can use variable definitions (see ${text} and ${messageId}). So first of all let us recap what variables do. Test variables are defined at the very beginning of the test case and are valid throughout all actions that take place in the test. This means that actions can simply reference a variable by the expression ${variable-name} .
Tip Use variables wherever you can! At least the important entities of a test should be defined as variables at the beginning. The test case improves maintainability and flexibility when using variables.
Now lets have a closer look at the sending action. The 'endpoint' attribute might catch your attention first. This attribute references a message endpoint in Citrus configuration by name. As previously mentioned the message endpoint definition lives in a separate configuration file and contains the actual message transport settings. In this example the "helloServiceEndpoint" is referenced which is a message endpoint for sending out messages via JMS or HTTP for instance.
The test case is not aware of any transport details, because it does not have to. The advantages are obvious: On the one hand multiple test cases can reference the message endpoint definition for better reuse. Secondly test cases are independent of message transport details. So connection factories, user credentials, endpoint uri values and so on are not present in the test case.
In other words the "endpoint" attribute of the <send> element specifies which message endpoint definition to use and therefore where the message should go to. Once again all available message endpoints are configured in a separate Citrus configuration file. We will come to this later on. Be sure to always pick the right message endpoint type in order to publish your message to the right destination.
If you do not like the XML language you can also use pure Java code to define the same test. In Java you would also make use of the message endpoint definition and reference this instance. The same test as shown above in Java DSL looks like this:
Java DSL designer
import org.testng.ITestContext;
import org.testng.annotations.Test;
import com.consol.citrus.annotations.CitrusTest;
import com.consol.citrus.dsl.testng.TestNGCitrusTestDesigner;

@Test
public class SendMessageTestDesigner extends TestNGCitrusTestDesigner {

    @CitrusTest(name = "SendMessageTest")
    public void sendMessageTest() {
        description("Basic send message example");

        variable("text", "Hello Citrus!");
        variable("messageId", "Mx1x123456789");

        send("helloServiceEndpoint")
                .name("helloMessage")
                .payload("<TestMessage>" +
                    "<Text>${text}</Text>" +
                    "</TestMessage>")
                .header("Operation", "sayHello")
                .header("RequestTag", "${messageId}");
    }
}
Java DSL runner
import org.testng.ITestContext;
import org.testng.annotations.Test;
import com.consol.citrus.annotations.CitrusTest;
import com.consol.citrus.dsl.testng.TestNGCitrusTestRunner;

@Test
public class SendMessageTestRunner extends TestNGCitrusTestRunner {

    @CitrusTest(name = "SendMessageTest")
    public void sendMessageTest() {
        variable("text", "Hello Citrus!");
        variable("messageId", "Mx1x123456789");

        send(action -> action.endpoint("helloServiceEndpoint")
                .name("helloMessage")
                .payload("<TestMessage>" +
                        "<Text>${text}</Text>" +
                    "</TestMessage>")
                .header("Operation", "sayHello")
                .header("RequestTag", "${messageId}"));
    }
}
Instead of using the XML tags for send we use methods from TestNGCitrusTestDesigner class. The same message endpoint is referenced within the send message action.
Now that the message sender pattern is clear we can concentrate on how to specify the message content to be sent. There are several possibilities for you to define message content in Citrus:
- message : This element constructs the message to be sent. There are several child elements available:
- payload : Nested XML payload as direct child node.
- data : Inline CDATA definition of the message payload
- resource : External file resource holding the message payload The syntax would be:
<resource file="classpath:com/consol/citrus/messages/TestRequest.xml" />The file path prefix indicates the resource type, so the file location is resolved either as file system resource (file:) or classpath resource (classpath:). - element : Explicitly overwrite values in the XML message payload using XPath. You can replace message content with dynamic values before sending. Each
entry provides a "path" and "value" attribute. The "path" gives a XPath expression evaluating to a XML node element or attribute in the message. The "value" can be a variable expression or any other static value. Citrus will replace the value before sending the message. - header : Defines a header for the message (e.g. JMS header information or SOAP header):
- element : Each header receives a "name" and "value". The "name" will be the name of the header entry and "value" its respective value. Again the usage of variable expressions as value is supported here, too.
XML DSL
<send endpoint="helloServiceEndpoint">
    <message>
        <payload>
            <!-- message payload as XML -->
        </payload>
    </message>
</send>
<send endpoint="helloServiceEndpoint">
    <message>
        <data>
            <![CDATA[
                <!-- message payload as XML -->
            ]]>
        </data>
    </message>
</send>
<send endpoint="helloServiceEndpoint">
    <message>
        <resource file="classpath:com/consol/citrus/messages/TestRequest.xml" />
    </message>
</send>
The most important thing when dealing with sending actions is to prepare the message payload and header. You are able to construct the message payload either by nested XML child nodes (payload), as inline CDATA () or external file (
Note
Sometimes the nested XML message payload elements may cause XSD schema validation rule violations. This is because of variable values not fitting the XSD schema rules for example. In this scenario you could also use simple CDATA sections as payload data. In this case you need to use the <data> element in contrast to the <payload> element that we have used in our examples so far.
With this alternative you can skip the XML schema validation from your IDE at design time. Unfortunately you will loose the XSD auto completion features many XML editors offer when constructing your payload.
The The same possibilities apply to the Citrus Java DSL.
Java DSL designer
@CitrusTest
public void messagingTest() {
    send("helloServiceEndpoint")
        .payload("<TestMessage>" +
                "<Text>Hello!</Text>" +
            "</TestMessage>");
}
@CitrusTest
public void messagingTest() {
    send("helloServiceEndpoint")
        .payload(new ClassPathResource("com/consol/citrus/messages/TestRequest.xml"));
}
@CitrusTest
public void messagingTest() {
    send("helloServiceEndpoint")
        .payloadModel(new TestRequest("Hello Citrus!"));
}
@CitrusTest
public void messagingTest() {
    send("helloServiceEndpoint")
        .message(new DefaultMessage("Hello World!")));
}
Besides defining message payloads as normal Strings and via external file resource (classpath and file system) you can also use model objects as payload data in Java DSL. This model object payload requires a proper message marshaller that should be available as Spring bean inside the application context. By default Citrus is searching for a bean of type org.springframework.oxm.Marshaller .
In case you have multiple message marshallers in the application context you have to tell Citrus which one to use in this particular send message action.
@CitrusTest
public void messagingTest() {
    send("helloServiceEndpoint")
        .payloadModel(new TestRequest("Hello Citrus!"), "myMessageMarshallerBean");
}
Now Citrus will marshal the message payload with the message marshaller bean named myMessageMarshallerBean . This way you can have multiple message marshaller implementations active in your project (XML, JSON, and so on).
Last not least the message can be defined as Citrus message object. Here you can choose one of the different message implementations used in Citrus for SOAP, Http or JMS messages. Or you just use the default message implementation or maybe a custom implementation.
Before sending takes place you can explicitly overwrite some message values in payload. You can think of overwriting specific message elements with variable values. Also you can overwrite values using XPath (xpath) or JSONPath (json-path) expressions.
The message header is part of our duty of defining proper messages, too. So Citrus uses name-value pairs like "Operation" and "MessageId" in the next example to set message header entries. Depending on what message endpoint is used and which message transport underneath the header values will be shipped in different ways. In JMS the headers go to the header section of the message, in Http we set mime headers accordingly, in SOAP we can access the SOAP header elements and so on. Citrus aims to do the hard work for you. So Citrus knows how to set headers on different message transports.
XML DSL
<send endpoint="helloServiceEndpoint">
    <message>
        <payload>
            <TestMessage>
                <Text>Hello!</Text>
            </TestMessage>
        </payload>
    </message>
    <header>
        <element name="Operation" value="sayHello"/>
    </header>
</receive>
The message headers to send are defined by a simple name and value pair. Of course you can use test variables in header values as well. Let's see how this looks like in Java DSL:
Java DSL designer
@CitrusTest
public void messagingTest() {
    receive("helloServiceEndpoint")
        .payload("<TestMessage>" +
                "<Text>Hello!</Text>" +
            "</TestMessage>")
        .header("Operation", "sayHello");
}
Java DSL runner
@CitrusTest
public void messagingTest() {
    receive(action -> action.endpoint("helloServiceEndpoint")
        .payload("<TestMessage>" +
                "<Text>Hello!</Text>" +
            "</TestMessage>")
        .header("Operation", "sayHello"));
}
This is basically how to send messages in Citrus. The test case is responsible for constructing the message content while the predefined message endpoint holds transport specific settings. Test cases reference endpoint components to publish messages to the outside world. The variable support in message payload and message header enables you to add dynamic values before sending out the message.